Very Merry Christmas

December is upon us and with that comes jolly tunes, twinkle lights, sugar cookies, presents, and CHRISTMAS CARDS! You have to admit, in a digital world receiving a holiday card via snail mail puts a smile on your face (unless you're the Grinch.) Here are some of our favorite and most popular holiday cards for 2012!

DIY Burlap Bunting Banner

Who doesn't love those adorable bunting banners you see used at weddings and parties? If you go on Etsy you can find HUNDREDS of adorable varieties of these babies. They can run you $15-$60 on average. If you're on a budget or more interested in DIY activities, these are very easy to do (and extremely budget friendly.) If you're a crafter you are going to have 90% of this on hand. You might have to run out and pick up a spool of jute twine, but that's only going to set you back $5-$6, or stencils (unless you're super confident in your painting skills and then you can just skip that all together.)

What You Need:
- Burlap (I'm using a burlap sack)
- Scissors
- Letter Stencils
- Acrylic Paint
- Sponge Brushes
- Jute Twine
- Liquid Stitch
- Sewing Machine

Before I started I quickly ironed out my burlap sack, not perfectly but just to remove some of the huge wrinkles, and then I cut out my four triangles. To get uniform triangles for the banner I created a template triangle out of cardboard. I went back over each triangle with the iron to make sure they were all nice and flat.

Be sure to lay something down under your burlap before you start stenciling (or you'll end up with paint on whatever surface you're working on.) Use your sponge to apply a thick layer of paint in each stencil.

After my paint dried I folded each top of my triangle and ran them through the sewing machine (before this, I actually put down a bit of liquid stitch just to give me a guide.) Once you're done sewing your triangles all you have left is to feed your twine through! Now you're done!

Wedding Inspiration | Burlap & Lace

I think burlap and lace are two of the most perfect elements to combine for a wedding. Burlap easily represents your casual and rugged groom, while lace represents your soft and elegant bride.

Both are a super popular item for weddings, which means both seem to increase in price at a rapid speed. Did you know that your local feed store will have burlap sacks you can purchase for a fraction of what you pay for a couple of yards of burlap at a craft store? You can cut them up and re-purpose them for your wedding. The same goes for lace. Purchasing lace at a fabric store is just crazy. Talk to your local seamstress or even look up scrap lace on Ebay. You'll be surprised at the price differences! If I could give just one piece of advice when you're planning and purchasing for your wedding, it would be: SHOP AROUND! If you found it for one price, chances are you're going to find it cheaper.

Here are some awesome ideas on how to incorporate burlap and lace into your wedding!

(Burlap & Lace Invitations | Burlap & Lace Table Runner)
(Burlap & Lace Bunting | Burlap & Lace Covered Bottles)
(Burlap & Lace Cake | Burlap & Lace Guestbook)
(Burlap & Lace Garter | Burlap & Lace Bouquet Wrap)

Mason Jar Wedding Invitations

If you're anything like me (and the Pinterest masses) you are all about the mason jars, and who can blame you? Functional, inexpensive, and they are timeless! No, seriously! They are! Just ask your grandma!

With so many ways to incorporate mason jars into your wedding, why not display them proudly on your wedding stationery?


Fancy Feature | pinkEpromise

I've been fortunate enough to work with my close friend Stephanie at Sprout Web Designs on a few really great projects. One of my favorites being the pinkEpromise website. What is pinkEpromise? It's a daily deals site, but not just your ordinary daily deals site. 5% of every sale goes to a breast cancer foundation! The foundation that pinkEpromise was built on is that they save YOU money and YOU help save breast cancer patients. pinkEpromise was developed as a way to raise awareness and money for a special breast cancer foundation that directly helps patient healing with spiritual, mental, physical and emotional guidance while they receive their medical care.

Be sure to sign up for the pinkEpromise daily deals newsletter! You can also find them on Facebook.

Small Business Talk | Lucky Charms

I recently saw someone make the remark that "small businesses just don't work and the ones that do just got LUCKY." Lucky? Luck? Granted I've only been a small business owner for 3 years at this point, but I don't remember being handed any lucky tokens or golden tickets. Willie must have forgotten about me that day. What I do remember about this entire process is a lot of work. I've seen plenty of people start businesses around the same time as I started Fancy Designs and I've seen a pattern. Lack of follow through. People expect to see immediate results and it just doesn't work like that. It's like when you're trying to lose those last 5 lbs. They don't just come off the day you decide to lose them. It takes a lot of work. A LOT OF WORK! If you start a business because you expect to see immediate results, you're living in a fantasy world. Sometimes that happens, but it's just not a realistic way to look at it. You can't expect to take shortcuts, you can't expect to have the same outcome someone else has had, you just have to do your own work, put in the time, and wait patiently.

I'm a contributor for IAWEO and one of the recent topics was "Why did you start your small business?" I started my business to bring a service to people that I didn't think they necessarily were receiving with varying budgets. Atleast that's what I like to tell myself. The day that I jumped head first into launching my business was when I realized that none of the people I expected to be supportive of my goal believed in me. I never once heard, "This is so exciting, I hope this goes well for you." I've learned over the years that if you want to see my full potential, all you have to do is not believe in me. I enjoy proving a nay sayer wrong but more than that, I enjoy proving to myself that I can do anything I set my mind to. I think that is the exact mind frame anyone considering going into business should have.

If you're willing to work hard, believe in yourself, and work EVEN HARDER, things can happen for you. Yes, that's going to mean looking in your bank account and asking yourself if you can survive off Ramen Noodles for the month. It's going to mean staying in to work late when your friends are out having a good time. There are countless sacrifices you are going to have to make, but if it's your true dream to own a business those sacrifices won't even be remembered 2 years down the road. All you'll see is what you've created for yourself.

It's All In The Display

I can't believe that October is almost here. That means Fall is close, but more importantly it means Fancy Designs will be backstage at the 64th Annual Country Music Awards. I can barely contain my excitement, especially after taking a peak at this years nominee list. Blake Shelton, Miranda Lambert, Luke Bryan, Eric Church, Lee Brice, Brantley Gilbert, Little Big Town, Zac Brown Band...OH MY! I thought long and hard about what would be the perfect item for me to display backstage and what better to display at a music awards event than a speaker? A custom speaker with distressed leather and parchment elements! What do you think?

Funny How a Melody Sounds Like a Memory

Nothing like a little Eric Church to get me into the mood for the 46th Annual Country Music Awards!

We'll have a fabulous country/western themed notecard set going into 85 celebrity swag bags as well as 35 swag bags that will be received by various members of the press. We'll also have something very special on display for celebrities to pose with (but that's for another day!) I'd like to introduce you all to the designs I've cooked up (and brought back) for this fantastic event.

Firstly, our Rustic Lace Notecards. These are very near and dear to my heart. They are modeled after the invitations I designed for our April 2013 wedding! Very light and elegant! Perfect for sending love notes to that special someone.

Our Divine Bovine collection is making a comeback for this event!

Another favorite of mine, our Rustic Parchment Notecards. I love the textures on it!

and lastly, our Western Skulls Notecards, that were inspired by my fiance, the bullrider.

46th Annual Country Music Awards

We are so excited to announce our participation in the 46th Annual Country Music Awards thanks to our association with The Artisan Group. If you've been following my blog, you may remember our participation in GBK's Emmy Awards Gift Lounge. It's a very exciting process and I cannot wait to share with you what we have in store for the country music icons backstage at the Bridgestone Arena in Nashville, Tennessee!

I Didn't StUTTER

Shortly after getting the opportunity to gift one of my all-time favorites, an opportunity to gift Trista Sutter came up. Yes, Trista Sutter, from The Bachelorette (the gorgeous gal who snagged up her hunky fire fighter.)

I immediately started thinking romantic, elegant, and sweet for her design, and our Romantic Rose line was born! The design was printed on metallic champagne paper to give it an even classier quality.


This Is No sTori

It's been a while! I'm so happy to be settling back into my blog. A big thanks goes to Sprout Web Creations for helping me get it all up and running!

In the time we've been away we've had some pretty big changes, amazing opportunities, and great news come to Fancy Designs! (All in due time!) For starters The Artisan Group had an amazing opportunity to gift, non other than one of my all-time favorite people, Donna Martin Tori Spelling! The fashion & craft icon herself.

I decided to go with a sleek chevron pattern in a kelly green tone as the theme for Tori, adding a chandelier embellishment to her note card set. We also included a matching iPhone 4 case.

Be sure to check out our Tori Collection here.

How Pinteresting | Wedding Edition

Pinterest has to be the next best thing since Facebook and Twitter! Whether you're trying to organize your home, feed your picky children, planning a vacation, looking for a place to stash all the interesting things you find on the web, or just want to be inspired, Pinterest has something for you.


I'm newly engaged and we're in the beginning stages of planning our 2013 wedding and Pinterest has been an amazing tool for that. One place where I can put EVERYTHING together. Recently a friend suggested that I should chronicle our wedding planning, progress, and then our actual wedding through my blog, something I can look back on. At first I was a bit apprehensive because I have never found a good balance between personal and professional in my blogging world but I think it might be a good thing. My Happily Ever After board has become increasingly popular so that makes me think there have to be a lot of people out there with my taste. Why not offer tips, advice, and a little more inspiration?

We've decided to go with an outdoor/rustic/woodland theme for our wedding. Our colors are more of a neutral tone (champagne, tan, light brown) and we'll be pulling some color in with lavender and yellow craspedia. We've also decided against traditional flowers. We'll have a lot of unflower, flowers; moss, larkspur, babys breath, wheat, and cotton stalks.


(Rustic Bouquets | Bridal Buds)


(Babys Breath | Style Me Pretty)


(Craspedia | Style Me Pretty)

Peanut Butter Cookies


What You Need:
- 1 cup sugar
- 1 cup brown sugar
- 1 cup butter
- 1 cup peanut butter
- 2 eggs
- 1 1/2 cups flour
- 1/2 tsp baking soda
- 1 1/2 tsp baking powder
- 1/4 tsp salt

Cream together your butter, sugars, and peanut butter. Beat in eggs, one at a time. In a separate bowl mix together your dry ingredients. Stir your dry ingredients into your butter mixture.

Refrigerate your dough for atleast two hours.

Preheat your oven to 375 degrees F. Shape your dough into 1 inch balls. Flatten with a criss-cross pattern with the back of a fork and bake for 10 minutes (8 or 9 if your oven gets REALLY hot.)

Adventure In Candy Land

Today I'm going to teach you how to make a homemade lollipop. YEP, you heard me, lollipop! These are super fun and your family and friends are just going to love them. The beauty of it is, you can use as many shapes and sizes as you like.


What You Need:
- Candy Thermometer
- Parchment Paper
- Baking Sheet
- 1 1/2 Cups of Sugar
- 3/4 Cup of Water
- 2/3 Cup Light Corn Syrup
- 1/2 tsp. Cream of Tartar
- 1/2 tsp. Peppermint Oil
- Paste Food Coloring
- 10 Lollipop Sticks

Firstly you want to spray down your or butter your molds and/or cookie cutters. Remember how I said you can make as many shapes and sizes as you like? You'll be able to pour your sugar mixture right into the cookie cutters of your choice. Want to make some heart shaped lollipops for your sweetheart on Valentine's Day? Pull out your Valentine cookie cutters! Easter eggs? Gingerbread men? The possibilities are endless. Or you can just go for a good old circle! Circular cookie cutters/biscuit cutters make a perfect mold for your lollipops!

In your saucepan combine your sugar, water, corn syrup and cream of tartar over medium heat. Stir until all the sugar is dissolved. Bring your sugar mixture to a boil, without stirring. Remove from heat once your candy thermometer reachers 300 degrees F. (Be sure that your thermometer is clipped to your sauce pan and isn't touching the bottom of your pot.)
WARING! Be EXTREMELY careful. Sugar gets HOT and fast. You do not want to burn yourself. If you're a taste tester in your kitchen, do not be tempted to give this a little finger taste. You will burn the you-know-what out of yourself!


Stir in your oil (be careful because it's going to smell very strongly.) Poor your mixture into your prepared cutters and/or molds.
Optional: Drop in small amounts of food coloring and swirl.

Just before your candy sets, remove your molds, and insert your lollipop sticks.

Roasted Banana Ice Cream

I was all prepared to make some fantastic roasted banana cupcakes with peanut butter buttercream frosting when Will tells me that he'd like ice cream instead of cupcakes. I'd gotten my heart set on some yummy roasted banana so I decided to not be thwarted. I love the way my house smells when bananas are roasting away in the oven!


What You Need
- 3 ripe bananas
- 1/3 cup brown sugar
- 1 tbsp. butter
- 1 cup butter milk (or whole milk)
- 1/2 cup whipping cream
- 2 tbsp. sugar
- 1/2 tsp. vanilla extract
- 1/4 tsp. salt


Start by preheating your oven to 400 degrees F. While your oven is preheating peal your bananas and cut them up. Toss them with the brown sugar and butter and pop them into the oven. Let them bake for about 15 minutes, give them a stir, and pop them back in for another 15 minutes. (Enjoy the amazing smell wafting around your kitchen as the bananas get all brown and coated in that delicious brown sugar syrup.)

Once your bananas are roasted scrape the bananas, as well as the syrup at the bottom of your baking dish, into a food processor. Add in your milk, whipping cream, sugar, vanilla, and salt. Puree until you have a nice, smooth mixture.


Refrigerate for about 4 hours and pop it into your ice cream maker. Now you patiently wait for this mixture to become a delicious batch of ice cream! Scoop your ice cream into a freeze safe container and then ENJOY!

Baked Chicken Tenders


What You Need:
For Tenders
- 4 boneless, skinless chicken breasts
- panko bread crumbs (Emeril has some pretty awesome Panko)
- 1 cup milk
- 1 egg
- seasoning, we use Slap Ya Mama
For Sauce
- ketchup
- yellow mustard
- 1 tsp. brown sugar
- dash soy sauce

Preheat your oven to 350 degrees F and coat a baking sheet with cooking spray. Cut your breasts into strips. Whisk together your egg and milk and sprinkle in some seasoning. I let my strips sit in the egg wash for about 5 minutes. Remove your strips from the wash and dredge in your panko. I bake mine for about 15 minutes, flip them, and bake for another 15 minutes. Depending on the thickness of your strips, this time may vary. Just be sure to cook THROUGH!

If you're more of a ketchup dipper, go for it. This is one of my favorite little quick and easy sauces to make. Depending on how many people you plan to feed, you can put this together to suit your needs. Just remember 1 part mustard to 2 parts ketchup. For the two of us I usually do 4 tablespoons of ketchup, 2 tablespoons of mustard, 1 teaspoon of brown sugar, and then a dash of soy sauce. Whisk it together and enjoy! Of course you can adjust it to taste, if you like it a little more sour, add a bit more mustard. For a little spice, add in some Sriracha and it's GOLDEN!

Now you're ready to dip and dine!

Oven Fried Chimichangas

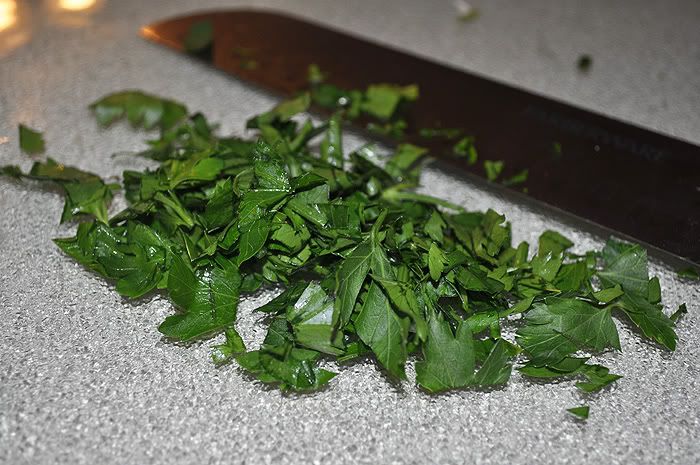
There are very few things that make me happier than a crispy, delicious chimichanga! The only bad thing about ordering one at a restaurant is that it's going to be DEEP FRIED. Of course, that's part of what makes it so delicious. Terrible, wonderful, DEEP FRIED! I discovered I could create a chimichanga just as tasty but WITHOUT the deep fried aspect! (Of course, I make up for the not deep fried by adding a terrific cheese sauce. What's a chimichanga without cheese sauce?)


What You Need
Chimichangas
- 4 boneless, skinless chicken breasts (cooked)
- 1 cup of rice (cooked)
- 1 can drained black beans
- 1 tsp. cumin
- 2 tsp. oregano
- 1 cup salsa
- 2 chopped scallions
- 1 green pepper
- 1 onion (preferably sauteed)
- low fat sour cream
- 6 whole wheat flour tortillas (burrito size)
Cheese Sauce
- 1 tbsp. butter
- 3 tbsp. flour
- 1 cup of milk
- 1/3 cup shredded cheese

Preheat your oven to 450 degrees F. Now you want to coat your sheet pan or casserole dish (whichever you choose to use) with some cooking spray. While the oven is preheating you can take the time to cook your chicken, rice, and to saute your onion. Shred your chicken up. Go ahead and combine your oregano and cumin into your salsa. Now that your chicken is all shredded, grab a bowl and toss all your ingredients in; the chicken, rice, drained black beans, your scallions, and your onion. (Depending on how you chop your pepper you can toss that in too or just lay them on top of this mixture.)

Now you can start arranging your chimichangas. I start with a dollop of sour cream right in the center of my tortilla, then a little shredded cheese, top that with my chicken mixture, roll, arrange, repeat. Once you've finished up, go ahead and pop those babies in the oven for about 20 minutes. When they come out you can enjoy them as is, add your favorite toppings (tomatoes, lettuce, sour cream, guacamole) or go ahead and add the cream sauce, which you can make while the chimichangas bake!

For the cheese sauce, you can either skip this step, take the easy way out and use some queso from the jar (or make your own queso) or go ahead and start melting your butter. Once your butter is melted you want to go ahead and whisk in your flour. Now you want to add in your milk. Once it's started to thicken and bubble, whisk in your melted cheese. Get that all melted and perfect. Remove from heat and set aside to let it thicken up a bit more. Top your chimichangas and ENJOY!

Shrimp & Mushroom Pasta

It sucks cooking in a household where you love mushrooms and fresh herbs and your boyfriend looks at them like they are poison you've snuck onto his plate. I have watched him spend 15 minutes picking out mushrooms, spinach and cheese from quesadillase, which left him with some dry tortilla and chicken. Needless to say, this dish was not a popular one in his eyes because it contained "grass" (what we normal people refer to as parsley) and the dreaded mushrooms! I'm the devious mastermind behind a plot to poison Will with fresh food.


What You Need:
- 8 oz. linguine
- 8 tbsp. butter
- 5 oz. mushrooms
- 2 tbsp. minced garlic
- 4 oz. cream cheese
- 1-2 tbsp. fresh parsley
- 1/2 cup water
- 1lb. shrimp
- salt, pepper, seasoning

Boil your noodles and while you're waiting you can go ahead and start cooking your shrimp. While my shrimp are cooking, I melt down about 2 tbsp. of butter and saute my mushrooms until they are soft and yummy.


Melt 4 tbsp. of butter and add in your cream cheese, parsley and garlic. Let your cream cheese mixture start to melt and then simmer for a few minutes. Add in your cup of water and stir your sauce. Toss in your mushrooms and your shrimp and bring the mixture to a boil.


Toss your noodles and your sauce together and enjoy!


Is there a certain food you love that your family just won't even give a chance? What's your favorite summer quickie meal?

Snicker's Cheesecake

For Father's Day I made a Snickers Cheesecake and it was a big hit. I was a bit nervous of how it would turn out since it was basically a full on experiment that took place at 9 o'clock at night. For one of my little late night experiments, it wasn't half bad, actually, it was pretty amazing.


What You Need:
- 26 Oreo Sandwich Cookies
- 8 tbsp melted butter
- 32 oz. room temperature cream cheese
- 1 1/2 cups of sugar
- 4 eggs
- 3/4 cup of heavy cream (plus 1/2 a cup)
- 2 tsp. vanilla
- 8 oz. white chocolate
- 5 oz. semi-sweet chocolate (plus 4 oz.)
- 18 mini Snickers bars, finely chopped (plus about 10 for garnishing)

Preheat your oven to 325 degrees F and prep your 10" spring form pan and place it on a baking sheet. Process your sandwich cookies through your food processor, or place them in a zip lock bag and pound them out with your rolling pin (this method is very therapeutic for your nerves.) Add the melted butter to your processed cookies and make sure your crumbs are coated. Press coated crumbs into the bottom of your spring form pan. Bake your crust for 10-12 minutes or until crumbs are set. I took this time to pre-prep my mini Snickers bars.


In a double broiler, melt your white and semi-sweet chocolate. Remove from heat and let cool, but not harden. While I'm waiting for the melting to occur I placed my 4 packages of softened cream cheese into my mixer with the sugar and beat it until it's fluffy. Add in your eggs, one at a time and then add in your heavy cream and vanilla. Scrape down the sides and mix until incorporated.


Set your mixer to low and gradually mix in your melted chocolate. Once that's completely incorporated, remove your bowl from the stand and fold in your chopped Snickers bars.


Add your filling to your crust and bake for about 60-70 minutes. When I see there's only about 15 minutes left for my cheesecake to be popped out of the oven, I heat my 1/2 cup of heavy cream on the stove to a boil, remove it from heat and add in 4 oz. of semi-sweet chocolate and stir until completely melted. Once my cheesecake cooled, I poured on the yummy chocolate ganache and topped it with more chopped Snickers bar. I had to make mine two days early so it stayed all wrapped up until Sunday but it was still incredible! Light, chocolately and delicious!


What goodies did you make for Father's Day?