How Pinteresting | Wedding Edition

Pinterest has to be the next best thing since Facebook and Twitter! Whether you're trying to organize your home, feed your picky children, planning a vacation, looking for a place to stash all the interesting things you find on the web, or just want to be inspired, Pinterest has something for you.


I'm newly engaged and we're in the beginning stages of planning our 2013 wedding and Pinterest has been an amazing tool for that. One place where I can put EVERYTHING together. Recently a friend suggested that I should chronicle our wedding planning, progress, and then our actual wedding through my blog, something I can look back on. At first I was a bit apprehensive because I have never found a good balance between personal and professional in my blogging world but I think it might be a good thing. My Happily Ever After board has become increasingly popular so that makes me think there have to be a lot of people out there with my taste. Why not offer tips, advice, and a little more inspiration?

We've decided to go with an outdoor/rustic/woodland theme for our wedding. Our colors are more of a neutral tone (champagne, tan, light brown) and we'll be pulling some color in with lavender and yellow craspedia. We've also decided against traditional flowers. We'll have a lot of unflower, flowers; moss, larkspur, babys breath, wheat, and cotton stalks.


(Rustic Bouquets | Bridal Buds)


(Babys Breath | Style Me Pretty)


(Craspedia | Style Me Pretty)

Peanut Butter Cookies


What You Need:
- 1 cup sugar
- 1 cup brown sugar
- 1 cup butter
- 1 cup peanut butter
- 2 eggs
- 1 1/2 cups flour
- 1/2 tsp baking soda
- 1 1/2 tsp baking powder
- 1/4 tsp salt

Cream together your butter, sugars, and peanut butter. Beat in eggs, one at a time. In a separate bowl mix together your dry ingredients. Stir your dry ingredients into your butter mixture.

Refrigerate your dough for atleast two hours.

Preheat your oven to 375 degrees F. Shape your dough into 1 inch balls. Flatten with a criss-cross pattern with the back of a fork and bake for 10 minutes (8 or 9 if your oven gets REALLY hot.)

Adventure In Candy Land

Today I'm going to teach you how to make a homemade lollipop. YEP, you heard me, lollipop! These are super fun and your family and friends are just going to love them. The beauty of it is, you can use as many shapes and sizes as you like.


What You Need:
- Candy Thermometer
- Parchment Paper
- Baking Sheet
- 1 1/2 Cups of Sugar
- 3/4 Cup of Water
- 2/3 Cup Light Corn Syrup
- 1/2 tsp. Cream of Tartar
- 1/2 tsp. Peppermint Oil
- Paste Food Coloring
- 10 Lollipop Sticks

Firstly you want to spray down your or butter your molds and/or cookie cutters. Remember how I said you can make as many shapes and sizes as you like? You'll be able to pour your sugar mixture right into the cookie cutters of your choice. Want to make some heart shaped lollipops for your sweetheart on Valentine's Day? Pull out your Valentine cookie cutters! Easter eggs? Gingerbread men? The possibilities are endless. Or you can just go for a good old circle! Circular cookie cutters/biscuit cutters make a perfect mold for your lollipops!

In your saucepan combine your sugar, water, corn syrup and cream of tartar over medium heat. Stir until all the sugar is dissolved. Bring your sugar mixture to a boil, without stirring. Remove from heat once your candy thermometer reachers 300 degrees F. (Be sure that your thermometer is clipped to your sauce pan and isn't touching the bottom of your pot.)
WARING! Be EXTREMELY careful. Sugar gets HOT and fast. You do not want to burn yourself. If you're a taste tester in your kitchen, do not be tempted to give this a little finger taste. You will burn the you-know-what out of yourself!


Stir in your oil (be careful because it's going to smell very strongly.) Poor your mixture into your prepared cutters and/or molds.
Optional: Drop in small amounts of food coloring and swirl.

Just before your candy sets, remove your molds, and insert your lollipop sticks.

Roasted Banana Ice Cream

I was all prepared to make some fantastic roasted banana cupcakes with peanut butter buttercream frosting when Will tells me that he'd like ice cream instead of cupcakes. I'd gotten my heart set on some yummy roasted banana so I decided to not be thwarted. I love the way my house smells when bananas are roasting away in the oven!


What You Need
- 3 ripe bananas
- 1/3 cup brown sugar
- 1 tbsp. butter
- 1 cup butter milk (or whole milk)
- 1/2 cup whipping cream
- 2 tbsp. sugar
- 1/2 tsp. vanilla extract
- 1/4 tsp. salt


Start by preheating your oven to 400 degrees F. While your oven is preheating peal your bananas and cut them up. Toss them with the brown sugar and butter and pop them into the oven. Let them bake for about 15 minutes, give them a stir, and pop them back in for another 15 minutes. (Enjoy the amazing smell wafting around your kitchen as the bananas get all brown and coated in that delicious brown sugar syrup.)

Once your bananas are roasted scrape the bananas, as well as the syrup at the bottom of your baking dish, into a food processor. Add in your milk, whipping cream, sugar, vanilla, and salt. Puree until you have a nice, smooth mixture.


Refrigerate for about 4 hours and pop it into your ice cream maker. Now you patiently wait for this mixture to become a delicious batch of ice cream! Scoop your ice cream into a freeze safe container and then ENJOY!

Baked Chicken Tenders


What You Need:
For Tenders
- 4 boneless, skinless chicken breasts
- panko bread crumbs (Emeril has some pretty awesome Panko)
- 1 cup milk
- 1 egg
- seasoning, we use Slap Ya Mama
For Sauce
- ketchup
- yellow mustard
- 1 tsp. brown sugar
- dash soy sauce

Preheat your oven to 350 degrees F and coat a baking sheet with cooking spray. Cut your breasts into strips. Whisk together your egg and milk and sprinkle in some seasoning. I let my strips sit in the egg wash for about 5 minutes. Remove your strips from the wash and dredge in your panko. I bake mine for about 15 minutes, flip them, and bake for another 15 minutes. Depending on the thickness of your strips, this time may vary. Just be sure to cook THROUGH!

If you're more of a ketchup dipper, go for it. This is one of my favorite little quick and easy sauces to make. Depending on how many people you plan to feed, you can put this together to suit your needs. Just remember 1 part mustard to 2 parts ketchup. For the two of us I usually do 4 tablespoons of ketchup, 2 tablespoons of mustard, 1 teaspoon of brown sugar, and then a dash of soy sauce. Whisk it together and enjoy! Of course you can adjust it to taste, if you like it a little more sour, add a bit more mustard. For a little spice, add in some Sriracha and it's GOLDEN!

Now you're ready to dip and dine!

Oven Fried Chimichangas

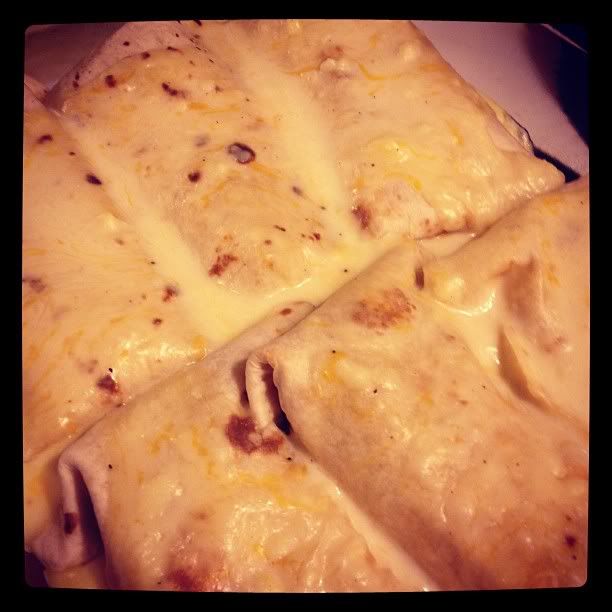
There are very few things that make me happier than a crispy, delicious chimichanga! The only bad thing about ordering one at a restaurant is that it's going to be DEEP FRIED. Of course, that's part of what makes it so delicious. Terrible, wonderful, DEEP FRIED! I discovered I could create a chimichanga just as tasty but WITHOUT the deep fried aspect! (Of course, I make up for the not deep fried by adding a terrific cheese sauce. What's a chimichanga without cheese sauce?)


What You Need
Chimichangas
- 4 boneless, skinless chicken breasts (cooked)
- 1 cup of rice (cooked)
- 1 can drained black beans
- 1 tsp. cumin
- 2 tsp. oregano
- 1 cup salsa
- 2 chopped scallions
- 1 green pepper
- 1 onion (preferably sauteed)
- low fat sour cream
- 6 whole wheat flour tortillas (burrito size)
Cheese Sauce
- 1 tbsp. butter
- 3 tbsp. flour
- 1 cup of milk
- 1/3 cup shredded cheese

Preheat your oven to 450 degrees F. Now you want to coat your sheet pan or casserole dish (whichever you choose to use) with some cooking spray. While the oven is preheating you can take the time to cook your chicken, rice, and to saute your onion. Shred your chicken up. Go ahead and combine your oregano and cumin into your salsa. Now that your chicken is all shredded, grab a bowl and toss all your ingredients in; the chicken, rice, drained black beans, your scallions, and your onion. (Depending on how you chop your pepper you can toss that in too or just lay them on top of this mixture.)

Now you can start arranging your chimichangas. I start with a dollop of sour cream right in the center of my tortilla, then a little shredded cheese, top that with my chicken mixture, roll, arrange, repeat. Once you've finished up, go ahead and pop those babies in the oven for about 20 minutes. When they come out you can enjoy them as is, add your favorite toppings (tomatoes, lettuce, sour cream, guacamole) or go ahead and add the cream sauce, which you can make while the chimichangas bake!

For the cheese sauce, you can either skip this step, take the easy way out and use some queso from the jar (or make your own queso) or go ahead and start melting your butter. Once your butter is melted you want to go ahead and whisk in your flour. Now you want to add in your milk. Once it's started to thicken and bubble, whisk in your melted cheese. Get that all melted and perfect. Remove from heat and set aside to let it thicken up a bit more. Top your chimichangas and ENJOY!

Shrimp & Mushroom Pasta

It sucks cooking in a household where you love mushrooms and fresh herbs and your boyfriend looks at them like they are poison you've snuck onto his plate. I have watched him spend 15 minutes picking out mushrooms, spinach and cheese from quesadillase, which left him with some dry tortilla and chicken. Needless to say, this dish was not a popular one in his eyes because it contained "grass" (what we normal people refer to as parsley) and the dreaded mushrooms! I'm the devious mastermind behind a plot to poison Will with fresh food.


What You Need:
- 8 oz. linguine
- 8 tbsp. butter
- 5 oz. mushrooms
- 2 tbsp. minced garlic
- 4 oz. cream cheese
- 1-2 tbsp. fresh parsley
- 1/2 cup water
- 1lb. shrimp
- salt, pepper, seasoning

Boil your noodles and while you're waiting you can go ahead and start cooking your shrimp. While my shrimp are cooking, I melt down about 2 tbsp. of butter and saute my mushrooms until they are soft and yummy.


Melt 4 tbsp. of butter and add in your cream cheese, parsley and garlic. Let your cream cheese mixture start to melt and then simmer for a few minutes. Add in your cup of water and stir your sauce. Toss in your mushrooms and your shrimp and bring the mixture to a boil.


Toss your noodles and your sauce together and enjoy!


Is there a certain food you love that your family just won't even give a chance? What's your favorite summer quickie meal?

Snicker's Cheesecake

For Father's Day I made a Snickers Cheesecake and it was a big hit. I was a bit nervous of how it would turn out since it was basically a full on experiment that took place at 9 o'clock at night. For one of my little late night experiments, it wasn't half bad, actually, it was pretty amazing.


What You Need:
- 26 Oreo Sandwich Cookies
- 8 tbsp melted butter
- 32 oz. room temperature cream cheese
- 1 1/2 cups of sugar
- 4 eggs
- 3/4 cup of heavy cream (plus 1/2 a cup)
- 2 tsp. vanilla
- 8 oz. white chocolate
- 5 oz. semi-sweet chocolate (plus 4 oz.)
- 18 mini Snickers bars, finely chopped (plus about 10 for garnishing)

Preheat your oven to 325 degrees F and prep your 10" spring form pan and place it on a baking sheet. Process your sandwich cookies through your food processor, or place them in a zip lock bag and pound them out with your rolling pin (this method is very therapeutic for your nerves.) Add the melted butter to your processed cookies and make sure your crumbs are coated. Press coated crumbs into the bottom of your spring form pan. Bake your crust for 10-12 minutes or until crumbs are set. I took this time to pre-prep my mini Snickers bars.


In a double broiler, melt your white and semi-sweet chocolate. Remove from heat and let cool, but not harden. While I'm waiting for the melting to occur I placed my 4 packages of softened cream cheese into my mixer with the sugar and beat it until it's fluffy. Add in your eggs, one at a time and then add in your heavy cream and vanilla. Scrape down the sides and mix until incorporated.


Set your mixer to low and gradually mix in your melted chocolate. Once that's completely incorporated, remove your bowl from the stand and fold in your chopped Snickers bars.


Add your filling to your crust and bake for about 60-70 minutes. When I see there's only about 15 minutes left for my cheesecake to be popped out of the oven, I heat my 1/2 cup of heavy cream on the stove to a boil, remove it from heat and add in 4 oz. of semi-sweet chocolate and stir until completely melted. Once my cheesecake cooled, I poured on the yummy chocolate ganache and topped it with more chopped Snickers bar. I had to make mine two days early so it stayed all wrapped up until Sunday but it was still incredible! Light, chocolately and delicious!


What goodies did you make for Father's Day?

Asian Glazed Drummies

I found this recipe on Pinterest and adapted it a little bit. I love chicken but I really love drummies. I developed that love at a very young age and anytime my grandma fries chicken, I'm the first in the kitchen to get my hands on the drumsticks!

What You Need
- 8 chicken legs, skinless
- EVOO
- 1 cup of water
- 1 tbsp. Sriracha Hot Sauce
- 1/2 cup Balsamic Vinegar
- 1/2 cup soy sauce
- 4 tsp. sugar
- 3 cloves diced garlic
- 1 tsp. grated ginger
- zest of 1 orange
- juice of 1 orange
- 2 tbsp. scallions

You want to brown your chicken legs on high for about 5 minutes with a little EVOO.


Egg & Cheese Breakfast Sandwiches

Pinterest has become my current obsession, my digital inspiration board and also A NEW RECIPE BOOK! It's so convenient and there are so many interesting things out there to try out! I saw my friend Dani Hall had pinned Egg and Cheese Breakfast Sandiwches and I knew I had to make a batch of these!

When I was little I LOVED eggs, especially when my Grandpa Charlie would make them "crusty" on the edges for me. As I got older, I started to lose taste for them. I'd eat them in my food but I'd never eat just an egg or an egg with toast. I just recently started to acquire a taste for eggs, mostly egg white omelets but I have a feeling I'm going to really enjoy these babies!


Calzones


My friend Lex told me that I had to post pictures and the recipe for these awesome calzones I made last night! I really wish I could remember where this recipe came from. I know I've had it for a years now, so lets just say that I don't take credit for these babies in anyway, they were someone else's brain child, I'm just sharing the wealth!

What You Need:
- Refrigerated pizza crust
- 1 lb. Italian Sausage
- Pepperoni
- Green Pepper
- Mozzarella Cheese
- Parmesan Cheese
- 2 tbsp. melted butter
- Pizza seasoning

Oreo Cheesecake Bites


We love cheesecake in this house, what we love more than cheesecake is CHOCOLATE with cheesecake so this seemed too perfect!

What You Need:
- 36 Oreo Cookies
- 1/2 cup unsalted butter
- 4 pkgs. cream cheese
- 1 cup sugar
- 1 cup sour cream
- 1 tsp. vanilla
- 4 eggs
- 4 squares semi-sweet chocolate

Preheat your oven to 350 degrees F. Line your 13 x 9 " pan with foil (make sure your ends overlap the sides.) Finely crush about 25 of your cookies.

Melt 1/4 cup butter and mix with your cookie crumbs. Line the bottom of your pan with your now softened crumbs.

Beat your cream cheese and sugar until well blended. Add in your sour cream and vanilla. Add your eggs, 1 at a time, beating each until well incorporated. Chop up your remaining cookies and gently fold into your batter. Pour your batter over your crust.

Bake for 45 minutes or until the center is almost set. Meanwhile melt your chocolate and your remaining butter. Let cool slightly and then spread over the top of the cheese cake. Refrigerate for about 3-4 hours. Using your foil handles, gently remove your cheesecake from your pan and cut into squares to serve.

Cautionary Tale: I would usually have lovely pictures of the completed product after sitting with the lovely chocolate, what's prettier than some set chocolate on top of 32 ounces of cream cheese? Well if you have dogs, like I do, I would like to warn you, don't attempt to seperate your foil from your pan while both dogs are playing a game of keep away right under your feet. It will end in you almost dropping the cheesecake on the floor, the dogs licking their chompers and you pulling a Cirque de Soleil to save the cheesecake and the poor cheesecake will look like it was just hit by a bus. If you are as lucky as me, you will have one piece that looks some what presentable to snap a picture of and then you can just eat the rest with a spoon, right off the foil, not even bothering with the squares.

Cadbury Egg Cupcakes


You Need:
- your favorite chocolate cupcake recipe
- 12 Cadbury eggs
- your favorite frosting recipe

Place batter in the bottom of each of your cupcake tins, then place a Cadbury egg in each and cover with batter.


Bake and then top with your fabulous icing.


Cadbury eggs definitely aren't my favorite but these cupcakes seem to be a big hit. Will keeps digging into them and I have to tell him to stay out of them so his cousin can have her cupcakes!

Chocolate Malt Cupcakes


I haven't had a lot of time to bake recently but last night felt like the perfect night. Nothing like a good cupcake to make a dreary night seem a little better. These babies were moist and delicious! I found this wonderful recipe through Culinary Chronicles.


Cupcakes
- 2 1/4 cups of all purpose flour
- 3/4 cups unsweetened Dutch process cocoa
- 1/2 cup granulated sugar
- 3/4 cups packed brown sugar
- 1 1/2 tsp. baking soda
- 1 cup malted milk powder
- 1/2 tsp. salt
- 1 cup whole milk
- 1 cup vegetable oil
- 3 large eggs, r.t.
- 8 oz. of sour cream, r.t.
- 1 tsp. pure vanilla extract

Buttercream
- 1 cup unsalted butter, r.t.
- 1 cup vegetable shortening, r.t.
- 1 cup malted milk powder
- 4 tbsp. unsweetened Dutch process cocoa
- 5 cups confectioner sugar
- 1 tbsp. milk

Preheat your oven to 350 degrees and line your muffin tins. Whisk together your flour, cocoa, granulated sugar, brown sugar, baking soda, malted milk powder and your salt.

With your mixer, slowly incorporate your wet (milk and oil) and dry ingredients (flour mixture.) Add in your eggs, one at a time, scrapping down the sides until incorporated. Beat in your sour cream and vanilla.

Divide the batter evenly amongst your cups. Bake for 20 minutes. Remove from oven and place on a cooling rack.

Whip your butter and shortening until it is light and fluffy. Mix in your malted milk powder and your cocoa until incorporated, scrap down the sides if you make a big mess like I did. Add in your powdered sugar 1/4 a cup at a time. Mix in a 1tbsp. of milk and beat for about 2 minutes. Fill up your piping bag and make your cupcakes pretty!

Better For You Chocolate Chip Cookies


What You Need:
- 2 tbsp. butter
- 2 tbsp. canola oil
- 1/2 cup dark brown sugar, packed
- 1 tsp. vanilla extract
- 1/4 tsp. salt
- 1 egg white
- 3/4 cup all purpose flour
- 1/4 tsp. baking soda
- 1/3 cup chocolate chips

Preheat your oven to 375 degrees F. Cream together your butter, oil and dark brown sugar. Mix in your vanilla, salt and your egg white.

Mix together your dry ingredients and then slowly incorporate them into your batter mixture. Fold in your chocolate chips.

Drop half teaspoons of batter onto your cookie sheet and bake for 6-7 minutes.

The End Is Sweet

A year ago if you had asked me if I thought my silly little business would become successful, I would have told you probably not. Had you asked me if I thought my products would make it into the hands of celebrities at a celebrity gifting suite hosted by GBK Productions, I would have thought you were crazy. It's amazing what a little hard work, determination, and a can do attitude can get you. Of course, I didn't accomplish any of this all by myself. If it wasn't for Valerie Guerrero, Nikki Cutro, The Artisan Group & Gavin B. Keilly, none of this would have been possible. If my business flopped tomorrow, I'd be the happiest person because this year has been one of the craziest, busiest and most nerve wracking of my entire life. Every paper cut and freak out was well worth it.


(The extremely handsome Wes Ramsey from The Playboy Club and the very funny Zach Woods from The Office with our iPhone 4 case.)


I have so many plans for the future of Fancy Designs and myself and I wouldn't be making these plans without the support of such an amazing organization and such terrific members.

Be sure to check out the rest of the pictures from the terrific event here!

Hello Emmy's

Our stuff is off to the Emmy's this week. I've been so nervous and excited, which hasn't helped with the other stresses in my life. I'm a little relieved that it's here, sad to see it go and hoping for the best! After seeing everything that has gone into our swag bag, that will go to the press, that will be displayed on our table, I know it's going to be a hit. The swag is pretty amazing!

Here's a little sneak peak at the Emmy's Event Guide!


Did you know The Artisan Group has an official Gift Guide? Check it out! Perfect for the holidays that are right around the corner!

GBK's 2011 Primetime Emmy Awards Gift Lounge

It's so hard to believe that it's already August. It's even harder to believe that September is right around the corner and with that brings the Emmy Awards Gift Lounge. I've been so excited up until now. I started packing all my bags and my display piece up to send off to California and it struck me just how real this is. It's 46 days away! Seeing the amazing nominee list had butterflies in my stomach (what if some amazing actress like Melissa McCarthy or Betty White likes my stationery or some stud like Hugh Laurie or Timothy Olyphant just looks at them for a slit second before tossing them out...) BIG butterflies!

Sadly I can say, without a doubt, that none of us will be heartbroken to get these bags out of the house. Marie and Martini will be very happy to not be banned from any room that I happen to be storing them in and Will is going to be happy that I'm not constantly cursing because I'm tediously pinning Fancy Designs pins onto bags.


I can't say enough how thankful I am for The Artisan Group. Thank you so much Valerie and Nikki for having faith in me. And of course, thanks to GBK Productions and their amazing gift lounges! Without them none of this would be possible!

Emmy Day Now

My Emmy's prep is coming to an end and September is right around the corner. It's exciting but a little sad at the same time. I've had a lot of fun with it, learned a few things about packaging and met some really incredible people along the way. Two weeks ago I finished my bags and this weekend I came home to find that I had to replace a few bags (thanks to Marie and Martini.) It's a good thing I made extras for that very reason. It's my own fault. I forgot to put them back in the safe spot after photographing them. Will brought home a box that's big enough to fit all my stuff comfortably so now I'm patiently waiting for the okay to ship it all off to California!


I LOVED my little pins up until it came time to put them on. I've learned that when you have to deal with 100+ tiny pins, it's a bad idea and it will cause you to despise the adorable little pins you ordered for the occasion.

Emmy One Wanna Help?

After packaging my stationery into the cello-bags, I realized that I forgot one key component. THE ENVELOPES! I thought, this will be a breeze! Order some envelopes, pop them in the bags and you're done. Little did I know that I would order the envelopes and they wouldn't arrive for another 3+ weeks due to flooding. Then I encountered the first hurdle.

The envelopes are SPECKLED. No where in the description did they say "speckled." The brand might be Stardust but that doesn't necessarily mean that they are sprinkling dust into the envelopes...apparently it does though. All I could think is who can I pawn these off on and where can I order some more? After spending many, and I mean MANY, hours starring at the speckles, I realized the speckles actually contain the same colors that my stationery designs have (can I pretend like I planned that?) The more I looked at them, the more I liked them, so I decided to keep them!


Now I come to hurdle number two (have I ever mentioned I'm not a very good jumper?) The envelopes arrive but I don't immediately get to work on stuffing because I've already sent my Emmy's prep to my mom's house incase of flooding. That means I was given two weeks to broad about how I was going to package this up in the end. In my head, I no longer liked the placement of the stationery. I didn't like the one I picked to be front and center so I knew I had to change it, which meant a trip to my mom's house to bring all my stuff back here.


After I changed the placement, I got excited! It was time for the "fun" part. Boy was I wrong. There is nothing fun about stuffing 500 envelopes into 100 cell-o bags, as I am learning. In two days I am literally only 20 bags in and at this pace, I'm never going to get them done!

The Peacock Is Out Of The Bag

After tons of deliberation, and some much needed advice from Valerie, our display piece for the Emmy's Gift Lounge was decided upon! I knew I needed something eye catching, trendy and something you'd be able to pick out of a crowd. I knew from the beginning I needed to go with one of my iPhone 4 cases, I just couldn't pick WHICH ONE. Thankfully Valerie was there to give me some advice and we tweaked an existing design and made it even better!


These are customizable and you can add your name, a catch phrase or a funny slogan to the blue sash in a lovely gold tone!

Cute As a Button

When I was brainstorming how I planned to package my stationery for the Emmy Awards, I knew I wanted to add something to the organza bags. I thought about some really over the top bows, but I changed my mind. I didn't want it to be too much and I decided against having to make 110 bows (why give myself more work?) Then I thought about how cute a little button would be on the bags! I found a few places but they had crazy prices and refused to make the extra 10 I needed, they would only do 200. I really had no need for that many. Then I found Button Arcade on Etsy. Not only were their prices amazing but they were super friendly and were willing to do 110!

How cute are they?


Getting My Swag On

Preparing for the 2011 Emmy's has been a bit of a battle. It seems like no matter how many lists or charts I make, I find myself forgetting something or not accounting for something. With that said, I have to admit that this is stressful but TERRIFIC all at the same time. I recently discovered that I failed to account for the fact that I needed 550 envelopes...how does someone forget that? At the same time, we received amazing news that our products will not only be represented by The Artistan Group but we have the honor of being represented with GBK Productions.

Recently I received my clear bags that my stationery, envelopes and business cards will go into so I started the process of putting those together. We also made some improvements to our business card design and ordered some new ones and they look fabulous!

After finding out we got invited to the GBK gift lounge we also found out that one of our bags would go straight to the CEO of GBK Productions, Gavin B. Keilly. When Valerie said that it would be okay if we made something customized for him or his daughter, I think we all took advantage. I've seen some pretty amazing things being made for him, I hope he likes everything as much as I have so far!

I re-designed these note cards just for the occasion (and then regretted not ordering a set for myself.)


I couldn't be any happier with how they came out. I love the modern simplicity of the design and I hope he does too!